|
|
|
 |
 News
Support
Dealers
Company
Contact
Deutsch
News
Support
Dealers
Company
Contact
Deutsch
|
CBPaint - "Animated Signature" - Workshop
CBPaint has a great feature titled AutoPaint that lets you record movement and reproduce with an animated brush. One application of this tool is to produce an animated signature.
For practice, let's put this animated signature over a gradient fill background.
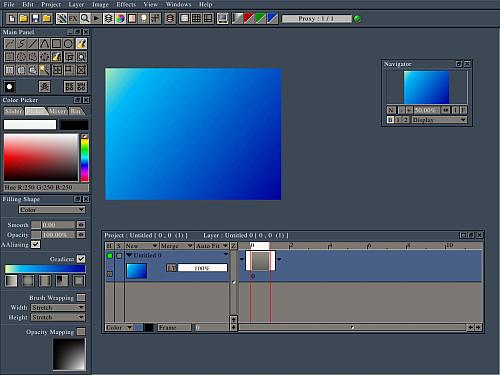
On the image layer already open (opens each time with CB Paint) click on the Flood Fill tool in the Main Panel - this opens up the 'Filling Shape' menu. Click on the 'Gradient' box and then left click AND hold on the color strip beneath the Gradient box. This opens up several color gradient choices. Select 'Sky' and let go. The color strip should now show sky-blue colors. Left click in the Project Window - it should show a checked pattern indicating you have begun a Fill. To complete the effect, left click and drag the pen/trackball from screen top left to screen bottom right and let go. This will build a gradient fill (you can click on the 'UNDO' button and change the direction if you wish to have your Gradient Fill go a different way). Now, add a new Animation Layer. Select the top layer by clicking on the layer.
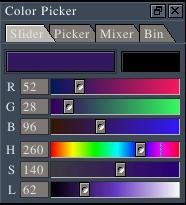
Select a color that will contrast well with your gradient fill background (I chose a dark blue). To modify your active colors; click on the 'Slider' tab in the Palette Panel - the left swatch is color A and the right swatch is Color B. Left click on Color A and you can modify that color by sliding the variables located directly beneath, or you can click on the 'Bin' tab and left click directly on a color you desire. Try that color out against your background by drawing onscreen. Click on UNDO to erase that move.
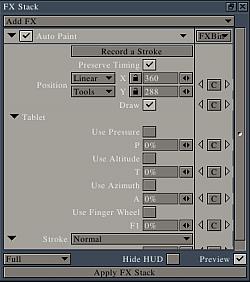
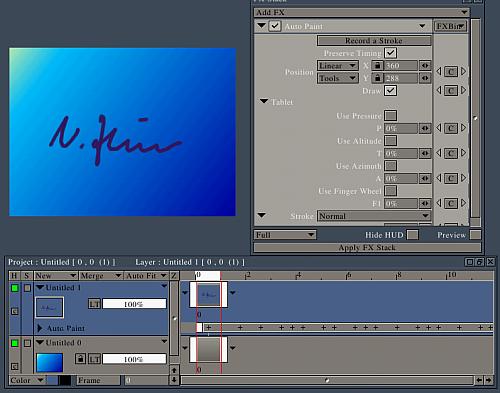
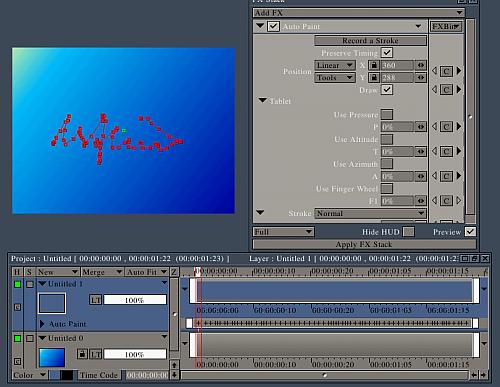
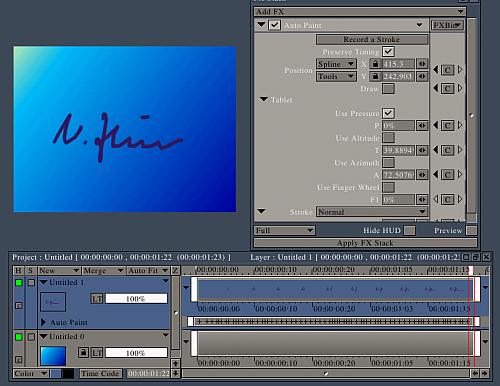
Click on 'Effects', scroll down to Paint and over to 'Auto Paint;' This brings up the FX Stack with the Auto Paint variables. Click on 'Record A Stroke' and write your signature on the Project Window. Click 'Stop Recording' when done. You will note this creates a series of points within your signature as well as keyframes beneath this layer that provides the coordinates for this automated signature.
Click on the 'Clear' button (skull & crossbones -- NOT the UNDO button) to delete the painted image - the keyframe info will be retained.
Click on the right side of this animated layer and drag to the right so that the layer extends above the full length of the keyframes. Now click on the right handle of the gradient fill background and drag this also to the right to extend the full length of the animated signature layer (this runs the background under the entire animation). Click on the preview button in the FX Stack and scroll the Position Bar to see what your automated signature looks like. Remember to view the video monitor (not the VGA monitor which will only show the keyframe coordinates).
I understand that some wedding/event videographers have their clients pay a premium to have this effect in their video. You could ask the client to provide a copy of their signature, enlarge it and place it on your Wacom tablet enabling you to copy the signature and using this great CB Paint feature! (Chet Davis)
|
|
|